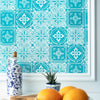
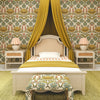
3 steps to install your mural easily
Author: Décor Imprimé
Do you want to refresh your decor in no time and without any mess? It's easy to install our murals yourself, since they are self-adhesive and require no glue or water. Here are 3 simple steps for a successful mural installation.
EASY STEP 1: Prepare your mural installation
You have already chosen and ordered your wall mural on our website? Before starting the installation of the mural, please take the following steps.
Have the following tools at hand

Prepare the surface
Check that the surface is perfectly clean and smooth. If the wall has any
imperfections, remove them by scraping or using sandpaper. Remember to remove any dust or residue before installing the mural.
Also unscrew the electrical socket plate with the screwdriver and set it aside.
EASY STEP 2: Make a temporary application
This step gives you a margin for error. Since the application is temporary, you can easily adjust the location of your decorative mural without damaging it.
Unpack the wallpaper.
Always start with the panel in the centre of the package.
Proceed with a temporary installation.
Unroll the panel and attach it to your wall with masking tape. Always start the installation of the mural in the upper left corner of the surface.
Check the level.
Use the level to make sure the panel is straight. Use the pattern of the mural, not the level of the wall.
Easy step 3: Installing your wall
Once the first panel is attached, all that remains is to complete the installation of the wall.
With the help of these professional tips, you will be able to apply it with ease.
Pro tip 1:
Peel off the protective film from the adhesive to a height of about 10 cm from the top corner of the panel. Using the application spatula, fix this section of the panel to the surface.
Pro tip 2:
Working from top to bottom, gradually remove all the protective film from the wall panel. Proceed one section at a time. Make sure the panel adheres to the surface with the application spatula.
Pro tip 3:
If air bubbles form in the panel, pierce it with a needle to remove the air. Cut around the electrical outlets with a utility knife.
Once the first panel is installed, repeat steps 2 and 3 until the wall is covered. Trim the excess with the utility knife. For more precision, guide the knife with the application spatula.
And that's it! Installing your own mural is easy. What are you waiting for?
To see our illustrated installation guides:
- Mural
- Frosted Film
- wall decal
-
Posted in
Décoration intérieure, DIY, installation, murale, papier peint, pellicule givrée


